The secrets now revealed. Welcome to the exciting world of video editing, where your creativity takes center stage. If you’re new to the scene and feeling a bit overwhelmed, fear not. In this guide, we’ll break down the process of video editing into simple, easy-to-follow steps. By the end, you’ll be equipped with the knowledge to turn your raw footage into a polished masterpiece. Let’s dive to unravel the secrets of video editing.
Secrets Nos 1 : Choose the Right Software
To kickstart your video editing journey, you need the right tool. For beginners, we recommend user-friendly software like :
- CapCut
- Adobe premiere
- Davinci Resolve
- Lightworks
- Shotcut
- ClipChamp
These are free, powerful, and perfect for learning the basics without breaking the bank.
The Learning paths of all software above is quite easy. We have pick Capcut to explain some of the very basic.
Capcut have both online and offline versions.
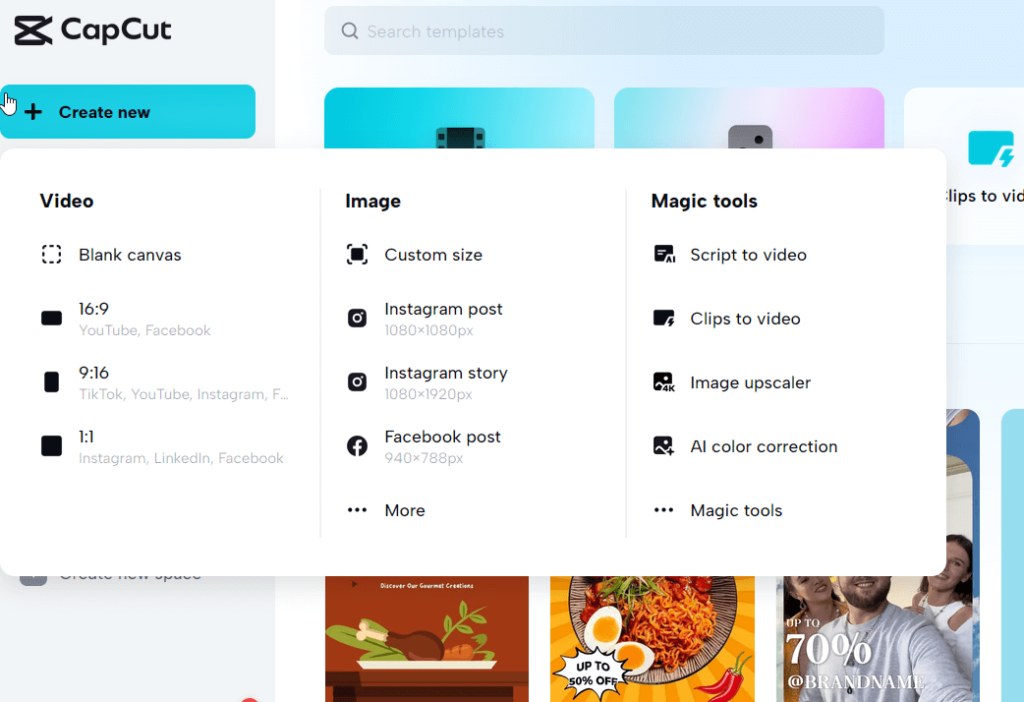
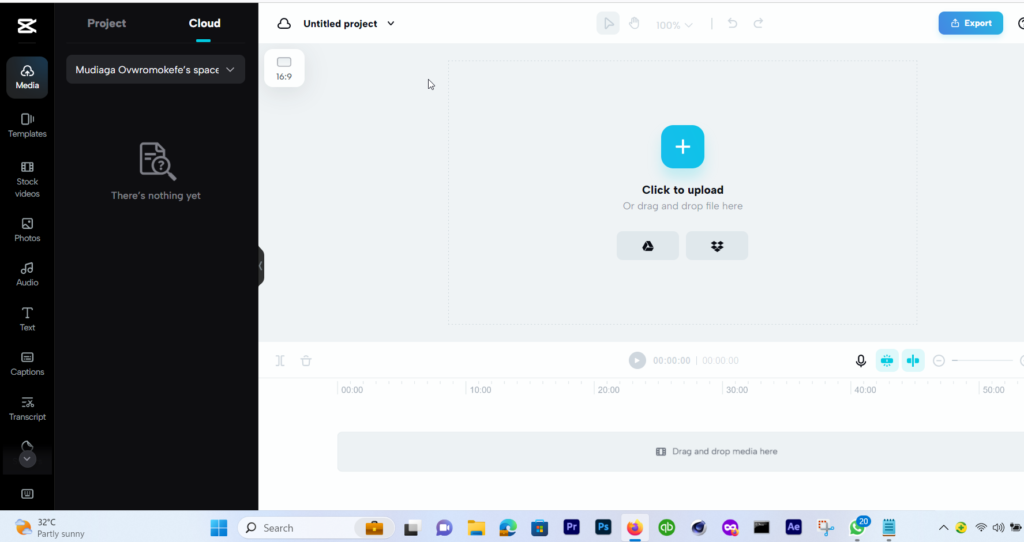
Capcut Interface
Secrets Nos 2: Import Your Footage
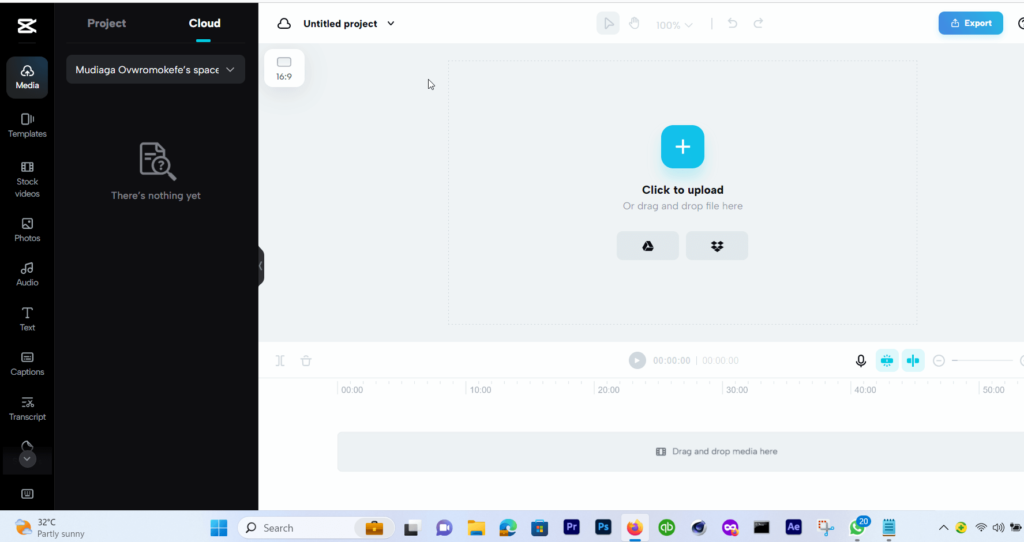
Once you’ve got your software ready,click on create to choose video format you have decided to work with. (16:9 for youtube, Istagram and other widescreen, see image above for reference)
Access the upload button and start a new project. The upload button is in the centre of the image above. Click on it and add your video clips to the project. This is the foundation of your masterpiece.
Step 3 Video Editing : Arrange Your Clips
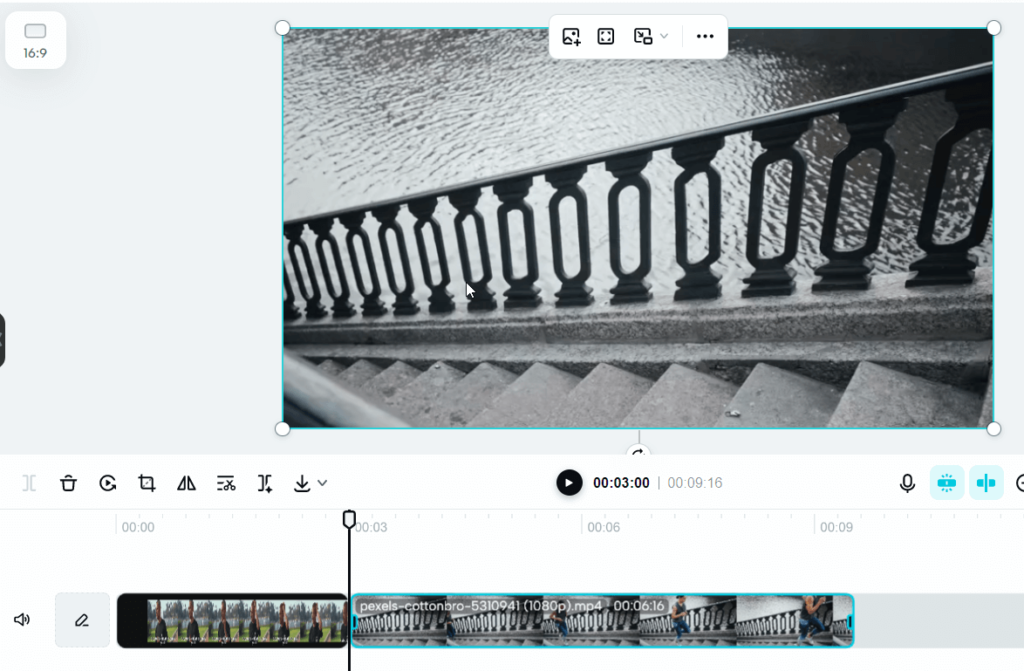
Drag and drop your video clips onto the timeline in the order you want them to appear. The timeline is like your canvas, where you’ll arrange and edit your clips to tell your story.
Step 4 video Editing : Trim and Cut
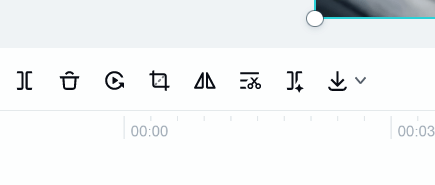
Now comes the fun part! Use the “cut” or “trim” tool to remove any unwanted sections from your clips. The cut tool is the first tool counting from left to right (or the inverted bracket symbol on the left of the second image). This cut tool helps you to tim or cut out irrelevant portion of your video clip to keep concise and engaging.
Now if you have edited two or more videos clips with different camera position or different scenes, try playing your timeline from the beginning, you will notice sharp transition between the different clips. This will not be pleasing to your viewers. To avoid that rough cut you apply transitions.
Step 5 Video Editing : Add Transitions
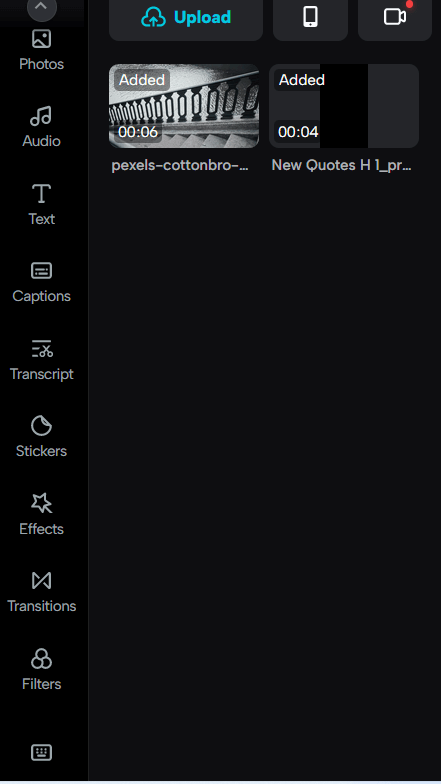

The work of transition is to smoothly connect your video clips together
- Click on the transition button on the tools bar on left of the image above and the transition window will open.
- Just in case you did not see the transition button in that position, click on the down arrow to scroll up, more functions will show up.
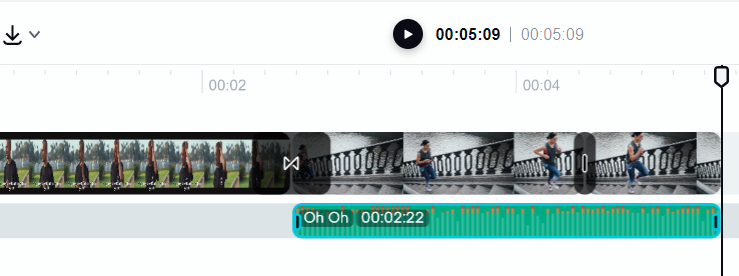
If you examine image 2 above you will notice there are two different video clips. - Make sure the vertical line is at the ending of the first clip and at the beginning of the second clip
- then click on the transition of your choice and it will be applied to your clip at the point where the two clips meet on the timeline.
CapCut have tons of transitions to choose from. Play around and enjoy yourself.
Boost your YouTube Channel 300% With Tubebuddy. Subscribe and and watch your YouTube Channel grow with this magic tool. Click below to subscribe.
Step 6 Video Editing : Spice It Up with Music
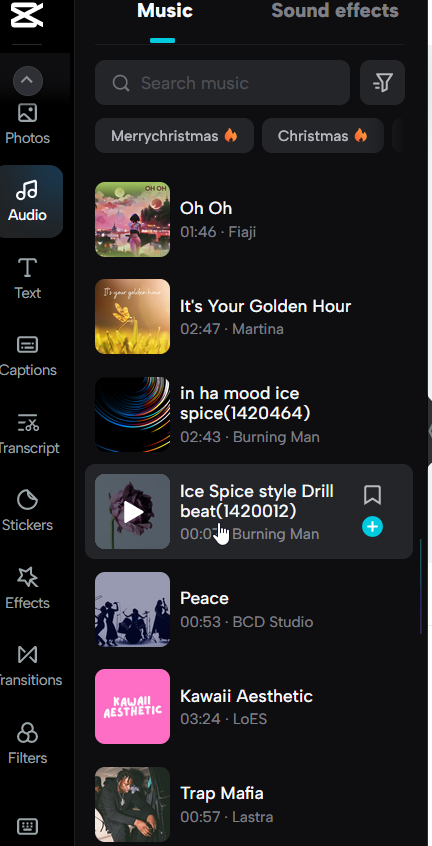
Enhance your video by adding a soundtrack.
Many editing programs allow you to import music files. Choose a tune that complements the mood of your video and adjust the volume accordingly.
- Click on the audio button on the vertical tool bar on the left above
- Select your desired audio by clicking on it. It will download from cloud.
- Put the vertical line where you want the audio to start on the timeline
- Click on the Plus button (+) next to the audio to add it to that point on timeline
Step 7 Video Editing : Adjust the Speed
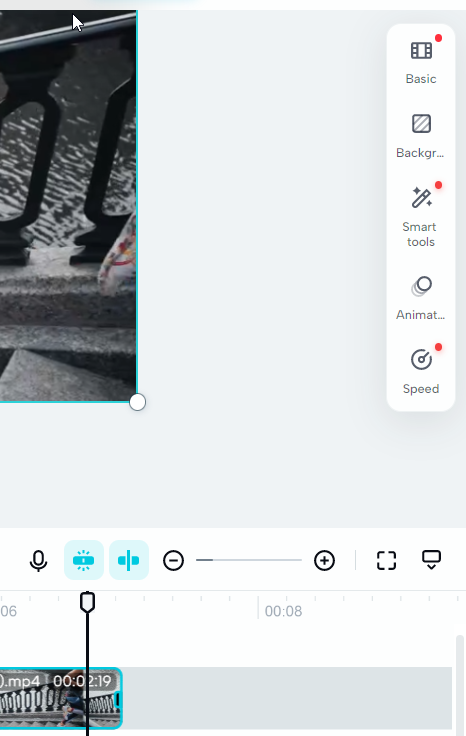
Experiment with the speed of your clips to add flair. Slow-motion can emphasize details, while a faster pace creates a sense of urgency. Play around until you find the perfect tempo.
To access the speed button
- Look to your immediate right on the workspace
- Click on the last bottom button label speed
- Make sure you have cut out the portion of video you desire to apply speed.
- Adjust the speed as you desire.
Step 8 Video Editing : Add Text and Title
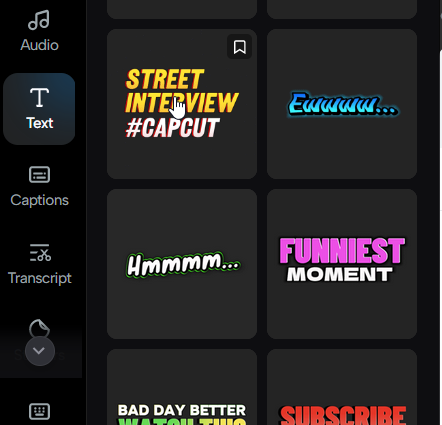
(Image 1)
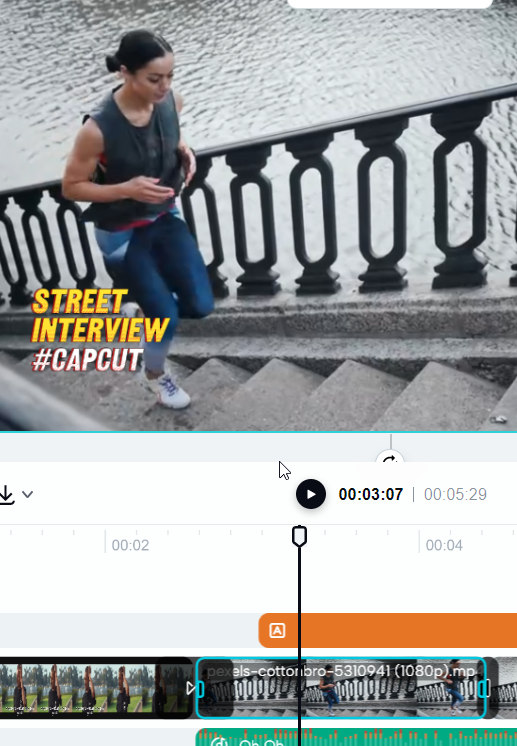
(Image 2)
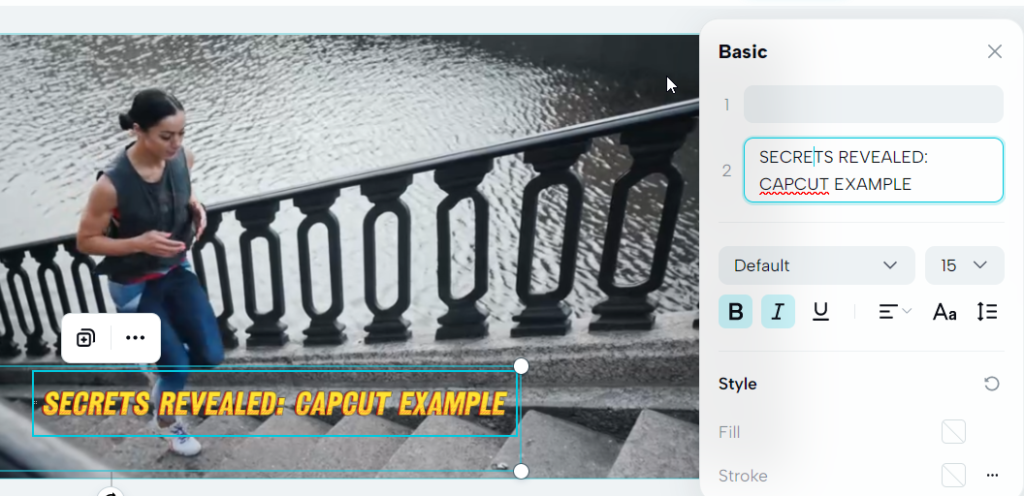
(Image 3)
If your video needs some context or explanation, use the text tool to add titles or captions. This step is essential for guiding your audience through the narrative.
To Add text to your work on the timeline do the following:
- Place the vertical line on the timeline at the position where you want the text to begin
- Click on the text tab or button from the tools menu on the left. (see image 1)
- Choose a text template suitable for you (see image 1)
- See the text on the example timeline ( see Image 2)
- Double click the text on your timeline to edit it ( see image 3)
- Edit your text. Double click on the text on the timeline. A new window will appear on the right of the timeline containing the text you double clicked.Type your desired text and it will reflect on the timeline ( image 3)
- Close the edit text window if you are satisfied with your text editing
Step 9 Video Editing : Apply Filters and Effects
You already know the drill now go to your tools panel on the left and click on the filter button to reveal tons of filters you can apply to your work.
Remember your applied filter will start from anywhere your vertical line on the timeline is positioned, so if you want your filter to be applied to the entire timeline make sure your vertical line is at the very beginning of the timeline.
Give your video a professional touch by experimenting with filters and effects. Enhance colors, add a vintage vibe, or go for a sleek black-and-white look – the choice is yours!
SHIPITO makes shipping from the US like a breeze. Shop anywhere in he US and ship to anywhere in the world hassles free. Sign up to their free account..Learn more
Step 10: Preview Your Masterpiece
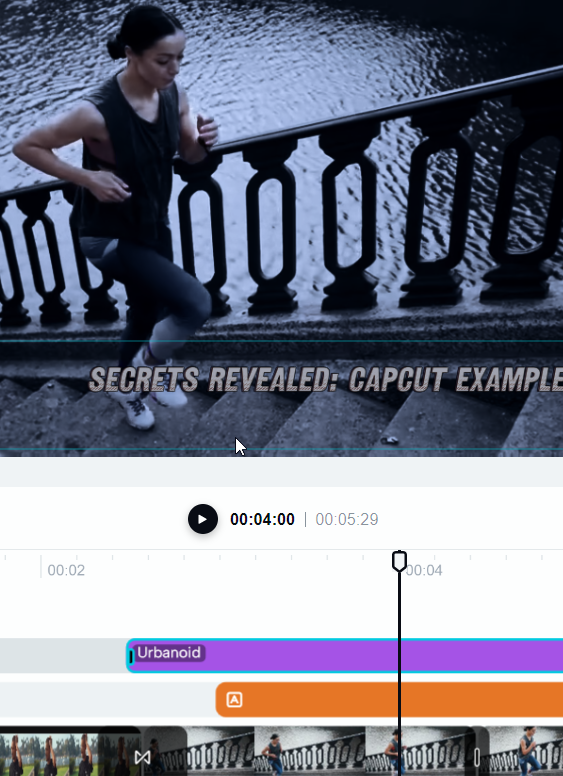
Before exporting your video, take it for a spin. Preview it or press the play button at the center of the image above to make sure everything flows seamlessly and looks just the way you want it.
Step 11: Export and Share

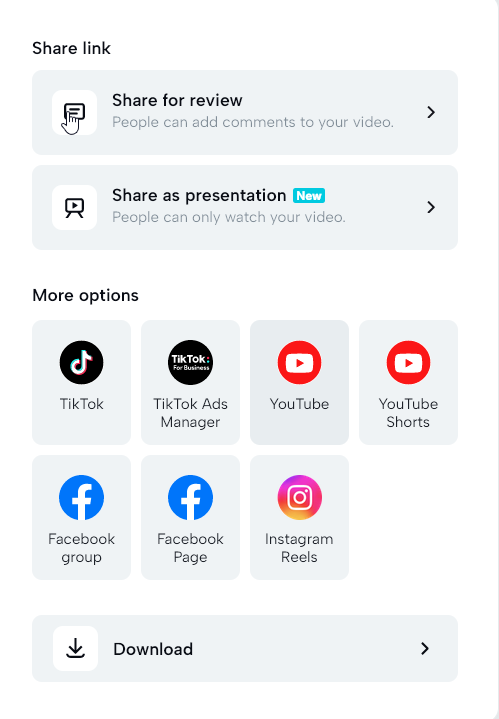
Once you’re satisfied with your creation, it’s time to share it with the world. Look for the “Export” or “Render” option, choose your settings, and save your video.
Click on the export button (image 1) on the far right top corner and export options will appear (as in image 2).
Choose Your mode of export, that is youtube, facebook, instagram or download to your device. The choice is your to make ( see image 2)
Step 12: Celebrate Your Success!
Congratulations, you’ve just completed your first easy peasy video editing project!
Now, share your creation with friends, family, or even the entire internet. You have officially joined the ranks of video editing maestros!
Remember, practice makes perfect. So, keep experimenting, exploring, and most importantly, having fun with your video editing adventures!



This website page is phenomenal. The wonderful data shows the essayist’s dedication. I’m shocked and envision more such magnificent posts.
Tu comentario refleja un enfoque exhaustivo y bien estructurado que es esencial para cualquier análisis serio del tema. La manera en que desglosas cada aspecto en partes comprensibles y las vuelves a ensamblar en un todo coherente es un testimonio de tu habilidad profesional.